SUMMARY: Prevent Word 2010 from keeping a second copy of edited images to decrease file size at the expense of disabling picture resetting.
When you insert a picture into a Microsoft Word 2010 document, you can perform a wide variety of edits including cropping, adjusting the brightness and contrast, and applying Artistic Effects such as Glass and Watercolor. All this can be performed without having to open an external image editor.After performing a picture edit, Word 2010 keeps an original copy of your image stored as a Windows Media Photo (WDP) file, a PNG or JPG copy of the image after edits have been applied, and data representing what edits were performed. This way, from the “Format (Picture Tools)” tab of the Ribbon, you can click on “Reset Picture” to revert your picture back to its imported state.
Resetting a picture to its imported state in Word 2010 – while a useful feature, this can increase document size
While the “Reset Picture” feature can be very useful if you perform many picture edits inside documents, it does come at a cost in terms of file size. If you have a document containing many images, it may use up too much RAM and/or hard drive space, potentially slowing down Word. Plus, these documents may be too large to transfer quickly over the Internet (such as via electronic mail) or to place on removable media. Thus, in these cases you may wish to remove the editing data and second copies of images.
By doing so you can greatly reduce a document’s file size, but the “Reset Picture” feature will be unusable after you save the file so make sure you save backup copies of your original, unmodified pictures!
1. Open a document to change its image editing data options or decide if you want to make this change for all newly-created documents.
2. Select the “File” tab in the Ribbon.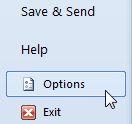
3. The Microsoft Office Backstage View appears. Click the “Options” button.
(Or instead of steps 2 and 3, press Alt + T, then the letter O.)
4. The “Word Options” dialog box appears. Click “Advanced” in the left pane.
5. In the right pane, next to “Image Size and Quality” (you may have to scroll down), click the pull-down to select from your open documents or “All New Documents”.
6. Check “Discard editing data”.
Discarding image editing data in Word 2010 for the “Pool Tips.docx” document
7. Click “OK” on the bottom-right of the dialog box to close it.
NOTE that if you need to discard editing data to decrease the size of a distributed document, you may wish to instead save a copy of the original, turn picture editing data off on the copy, and distribute the copy. Then you can still perform image resetting on the original.